Tag Archives: technology

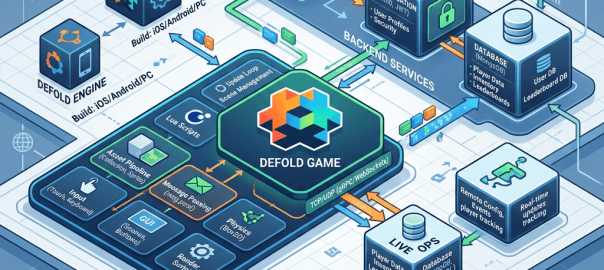
Defold Game architecture diagram connecting game engine, backend, cloud, database, and live operations

Building Defold HTML5 Games in GitHub Codespaces — A Complete Guide

How to set up a fully headless Defold development environment in the cloud, complete with unit testing, linting, and a live HTML5 demo — no desktop engine install required.

Why?

Defold is a fantastic free game engine, but its editor is a desktop application. If you want to develop Defold games on a Chromebook, an iPad, a locked-down work laptop, or just want your entire toolchain reproducible in the cloud, GitHub Codespaces is a great answer. This guide walks through everything I learned setting up a complete Defold → HTML5 pipeline from scratch: building with bob.jar, testing Lua with busted, linting with luacheck, formatting with StyLua, and serving a playable “Hello World” demo — all inside a browser tab.

What is Defold?

Defold is a free, open-source, cross-platform game engine developed by the Defold Foundation (originally by King). It’s designed for 2D games with first-class support for HTML5/WebAssembly, making it ideal for web games, instant games, and playable ads. Here’s what makes it stand out:

  • Zero cost, no royalties — completely free for commercial use, no revenue sharing, no seat licenses.
  • Lightweight & fast — the engine core is ~1-2 MB; HTML5 builds start around 2-3 MB gzipped. Cold starts are near-instant.
  • Lua + native extensions — game logic is written in Lua 5.1 (LuaJIT), with the ability to drop into C/C++/Rust for performance-critical code via native extensions.
  • Component-based architecture — game objects are composed of components (sprites, labels, collision objects, scripts, factories, etc.) attached to collections (scenes). No heavy inheritance hierarchies.
  • Built-in physics — Box2D for 2D physics with collision groups, raycasts, and joints.
  • First-class HTML5/WASM — one-click (or one-command) export to WebAssembly with asm.js fallback. Supports PWA, WebGL 1/2, and custom engine templates.
  • Live update — push content updates to live games without app store review (mobile) or re-deployment (web).
  • Headless CI-friendly build toolbob.jar is a standalone Java CLI that compiles, bundles, and packages projects without the editor. Perfect for automation, GitHub Actions, and Codespaces.
  • Small, helpful community — active forums, Discord, and extensive documentation. The engine has been battle-tested in production games like Plague Inc., Cosmic Top Secret, and many King titles.

Defold’s philosophy is “batteries included but not forced” — you get a complete 2D toolkit (rendering, physics, audio, input, GUI, particles, tilemaps, Spine/DragonBones animation) without being locked into a specific workflow or visual editor. The editor is there if you want it, but the project format is plain text, so you can version-control everything and even hand-author projects like we do in this guide.

The Architecture

Defold’s build system is Java-based, which is what makes this possible. The engine ships bob.jar — the same build tool the desktop editor uses internally. Given a project folder of text assets (collections, game objects, scripts), bob compiles them into a runnable bundle for any platform, including HTML5 via WebAssembly.

Our final layout:

defold/
├── bob.jar                      # Defold build tool
├── setup_environment.sh         # One-command environment restore
└── testproject/
    ├── Makefile                 # test / lint / fmt / build / bundle / serve
    ├── game.project             # Engine configuration
    ├── .luacheckrc              # Linter config with Defold globals
    ├── main/
    │   ├── main.collection      # Bootstrap collection
    │   ├── hello.go             # Game object (script + label components)
    │   ├── hello.script         # Game logic entry point
    │   ├── hello.label          # Text label definition
    │   └── game_logic.lua       # Pure-Lua module (unit tested!)
    ├── fonts/
    │   ├── RocknRollOne-Regular.ttf
    │   ├── rocknroll.font       # Defold font resource
    │   └── OFL.txt              # License (required by SIL OFL)
    └── spec/
        └── game_logic_spec.lua  # busted test suite

Step 1: Install the Toolchain

Note: for setting up the environment you can also copy the bash file at the bottom of the page and have an Ai agent execute it for you

Java + the system library nobody warns you about

bob.jar needs Java. Codespaces usually has it, but if not:

sudo apt-get update && sudo apt-get install -y default-jdk

The first build failure you’ll likely hit is cryptic:

UnsatisfiedLinkError: .../libmodelc_shared.so: libXi.so.6:
cannot open shared object file: No such file or directory

Headless containers lack X11 libraries that Defold’s native asset tools link against. One line fixes it:

sudo apt-get install -y libxi6

Download bob.jar

Get it from the official release (pin your version for reproducibility):

mkdir -p defold && cd defold
curl -sL -o bob.jar \
  https://github.com/defold/defold/releases/download/1.13.1/bob.jar
java --enable-native-access=ALL-UNNAMED -jar bob.jar --version

Gotcha: On modern JDKs (17+), bob’s native loaders trigger restricted-access warnings and can fail outright. Always run it with --enable-native-access=ALL-UNNAMED.

Lua tooling

Defold embeds Lua 5.1 (technically LuaJIT), so match your local tools accordingly:

sudo apt-get install -y lua5.1 luarocks
sudo luarocks install luacheck   # linter
sudo luarocks install busted     # BDD test framework
sudo luarocks install luaunit    # xUnit alternative

# StyLua formatter (binary download)
curl -sL -o /tmp/stylua.zip \
  https://github.com/JohnnyMorganz/StyLua/releases/download/v2.5.2/stylua-linux-x86_64.zip
unzip /tmp/stylua.zip stylua -d /tmp && sudo mv /tmp/stylua /usr/local/bin/

# lua-language-server (IDE autocomplete/diagnostics)
LLS_URL=$(curl -s https://api.github.com/repos/LuaLS/lua-language-server/releases/latest \
  | grep browser_download_url | grep linux-x64 | grep -v musl | cut -d'"' -f4 | head -1)
curl -sL -o /tmp/lls.tar.gz "$LLS_URL"
sudo mkdir -p /opt/lls && sudo tar -xzf /tmp/lls.tar.gz -C /opt/lls
sudo ln -sf /opt/lls/bin/lua-language-server /usr/local/bin/

Step 2: Create a Minimal Project

Defold projects are folders of plain-text files — perfect for hand-authoring when you can’t use the editor.

game.project — the INI-style config. Note the bootstrap paths point at compiled extensions (.collectionc); this is how bob resolves them internally:

[bootstrap]
main_collection = /main/main.collectionc

[display]
width = 640
height = 480

[input]
game_binding = /input/game.input_bindingc

main/main.collection — the root scene. It instantiates one game object:

name: "main"
instances {
  id: "go"
  prototype: "/main/hello.go"
  position { x: 320.0 y: 240.0 z: 0.0 }
  rotation { x: 0.0 y: 0.0 z: 0.0 w: 1.0 }
}

Key lesson: collections reference game object files; they don’t hold components inline. Put your script and label on hello.go.

main/hello.go — the game object owns both components. Position the object at screen center so rotations pivot correctly later:

components {
  id: "hello"
  component: "/main/hello.script"
  position { x: 0.0 y: 0.0 z: 0.0 }
}
components {
  id: "label"
  component: "/main/hello.label"
  position { x: 0.0 y: 0.0 z: 0.1 }
}

input/game.input_binding — maps left mouse button to the action name touch:

mouse_trigger {
  input: MOUSE_BUTTON_LEFT
  action: "touch"
}

Step 3: Hello World Script

local game_logic = require("main.game_logic")

function init(self)
    self.game = game_logic.new()
    msg.post("@render:", "clear_color", {color = vmath.vector4(0.2, 0.5, 0.9, 1.0)})
    -- pulse animation
    go.animate("#label", "scale.x", go.PLAYBACK_LOOP_PINGPONG, 1.2, go.EASING_INOUTSINE, 1.2)
    go.animate("#label", "scale.y", go.PLAYBACK_LOOP_PINGPONG, 1.2, go.EASING_INOUTSINE, 1.2)
    msg.post(".", "acquire_input_focus")
end

function on_input(self, action_id, action)
    if action_id == hash("touch") and action.pressed then
        self.game:add_score(1)
        go.animate(".", "euler.z", go.PLAYBACK_ONCE_FORWARD, 360,
            go.EASING_INOUTQUAD, 0.8, 0, function()
                go.set(".", "euler.z", 0)
            end)
    end
end

function update(self, dt)
    -- rainbow color cycling
    local t = (self.t or 0) + dt
    self.t = t
    local r = 0.5 + 0.5 * math.sin(t * 2.0)
    local g = 0.5 + 0.5 * math.sin(t * 2.0 + 2.0944)
    local b = 0.5 + 0.5 * math.sin(t * 2.0 + 4.1888)
    go.set("#label", "color", vmath.vector4(r, g, b, 1))
end

Three things worth noting:

  1. Rotate the game object ("."), not the component ("#label") — component rotation isn’t reliably animatable.
  2. Pivot matters — because the object sits at screen center and the label has pivot: PIVOT_CENTER, the spin rotates around the text’s visual center instead of flinging it off-screen.
  3. Game logic lives in a pure module — more on that below.

Step 4: Testable Architecture

Engine scripts can’t run under standard Lua interpreters — they depend on Defold globals (go, msg, vmath). The fix is classic hexagonal architecture: keep logic in pure modules and make scripts thin adapters.

-- main/game_logic.lua
local game = {}

function game.new()
    local self = setmetatable({}, { __index = game })
    self.score = 0
    return self
end

function game:add_score(points)
    assert(type(points) == "number" and points > 0, "points must be positive")
    self.score = self.score + points
    return self.score
end

return game
-- spec/game_logic_spec.lua
local game_logic = require("game_logic")

describe("game_logic", function()
    it("adds points to the score", function()
        local state = game_logic.new()
        assert.equals(10, state:add_score(10))
    end)
end)

Run with the module path pointing into main/:

busted --lpath="./main/?.lua" spec

Step 5: Build & Serve the HTML5 Bundle

This is where most of my debugging time went. The critical discovery: always clean-build when bundling, or bob silently reuses stale artifacts:

BOB := java --enable-native-access=ALL-UNNAMED -jar ../bob.jar

bundle:
	$(BOB) --platform wasm-web -a --bundle-output build_html5 clean build bundle

serve:
	cd build_html5/unnamed && python3 -m http.server 8000

Then open the forwarded port in your browser. That’s it — a real Defold game running in WASM, built entirely in the cloud.

Debugging tip: verify your deploy actually happened by comparing the archive size bob reports against what the server returns from archive/archive_files.json. Mismatch = stale bundle.

Step 6: Custom Fonts

Drop a TTF in the project and define a .font resource:

font: "/fonts/RocknRollOne-Regular.ttf"
material: "/builtins/fonts/font-df.material"
size: 48
output_format: TYPE_DISTANCE_FIELD

Critical pairing rule: distance-field fonts must use label-df.material; bitmap fonts need label-fnt.material. Mixing them produces ugly blocky outlines. Also remember labels require a size field — and it’s a Vector4 scale, not a number.

If you ship an OFL font, include its license file. It’s a legal requirement and takes two seconds.

Step 7: Disaster Recovery — The Setup Script

Everything above is captured in one idempotent script, setup_environment.sh. It checks each dependency before installing, pins versions, validates downloads, works under both root and non-root users, and finishes by running the full verification suite (tool versions + tests + lint). Run it in any fresh codespace and you’re back in business:

./setup_environment.sh
# ==> Environment fully restored and verified.

Commit it alongside the project. Your environment becomes as reproducible as your code.

Gotchas Cheat Sheet

GotchaFix
Platform js-web not supportedUse wasm-web
libXi.so.6: cannot open shared object fileapt-get install libxi6
Native access errors on modern JDKjava --enable-native-access=ALL-UNNAMED
Changes don’t appear after rebuildBundle must include clean build — stale cache lies
Error shows truncated path (main.collectio)Display quirk; not the real problem
Label won’t compileNeeds text, size (Vector4!), font, AND material
Blocky font renderingDF font ↔ label-df.material, bitmap ↔ label-fnt.material
Spin animation does nothingAnimate "." not "#component" for rotation
Rotation swings off-screenPivot = game object position; center the object, zero the component offset
.luacheckrc syntax errorIt’s Lua: -- comments and {} tables, not # or []

Wrapping Up

What we ended up with: a cloud-native Defold workflow with version-pinned tooling, automated quality gates (make check runs lint + format validation + 8 unit tests), one-command bundling, live preview over a forwarded port, and full disaster recovery in a single script. Total cost: free tier Codespaces hours.

The same pattern extends naturally — add a GitHub Actions workflow that runs make check && make bundle on every push and publishes build_html5/unnamed/ to GitHub Pages, and you’ve got continuous deployment for a browser game. But that’s a post for another day.

#!/usr/bin/env bash
###############################################################################
# Defold HTML5 dev environment bootstrap
#
# Restores the complete toolchain needed to build/test/serve this project:
#   - bob.jar (Defold build tool) + libxi6 system dependency
#   - Lua 5.1, Luarocks, Luacheck, busted, luaunit (testing)
#   - StyLua (formatter), lua-language-server (LSP)
#
# Usage:
#   ./setup_environment.sh          # install everything + verify
#   ./setup_environment.sh --no-verify   # skip verification step
#
# Assumes it is run from the repository root or from defold/.
###############################################################################
set -euo pipefail

SCRIPT_DIR="$(cd "$(dirname "${BASH_SOURCE[0]}")" && pwd)"
# Resolve defold/ dir whether script lives in defold/ or repo root
if [[ -d "$SCRIPT_DIR/defold" ]]; then DEFOLD_DIR="$SCRIPT_DIR/defold"; else DEFOLD_DIR="$SCRIPT_DIR"; fi

BOB_VERSION="1.13.1"
BOB_URL="https://github.com/defold/defold/releases/download/${BOB_VERSION}/bob.jar"
STYLUA_VERSION="2.5.2"

log() { printf '\n\033[1;36m==> %s\033[0m\n' "$*"; }

# Run a command with sudo only if not already root (codespace/root containers)
maybe_sudo() {
    if [[ $(id -u) -eq 0 ]]; then "$@"; else sudo "$@"; fi
}

apt_install() {
    maybe_sudo apt-get update -qq
    maybe_sudo apt-get install -y "$@"
}

###############################################################################
log "1/7 Checking Java (needed for bob.jar)"
###############################################################################
if ! command -v java >/dev/null 2>&1; then
    echo "Java not found. Installing default-jdk..."
    apt_install default-jdk
fi
java -version 2>&1 | head -1

###############################################################################
log "2/7 Installing system dependency libxi6 (required by bob's native tools)"
###############################################################################
dpkg -s libxi6 >/dev/null 2>&1 || apt_install libxi6

###############################################################################
log "3/7 Downloading bob.jar ${BOB_VERSION}"
###############################################################################
if [[ -f "$DEFOLD_DIR/bob.jar" ]] && java -jar "$DEFOLD_DIR/bob.jar" --version 2>/dev/null | grep -q "$BOB_VERSION"; then
    echo "bob.jar ${BOB_VERSION} already present, skipping download."
else
    curl -sL -o "$DEFOLD_DIR/bob.jar" "$BOB_URL"
    [[ $(stat -c%s "$DEFOLD_DIR/bob.jar") -gt 1000000 ]] || { echo "ERROR: bob.jar download failed"; exit 1; }
fi

###############################################################################
log "4/7 Installing Lua 5.1 + Luarocks + testing frameworks"
###############################################################################
command -v lua5.1 >/dev/null 2>&1 || apt_install lua5.1
command -v luarocks >/dev/null 2>&1 || apt_install luarocks
luarocks show luacheck >/dev/null 2>&1 || maybe_sudo luarocks install luacheck
luarocks show busted >/dev/null 2>&1   || maybe_sudo luarocks install busted
luarocks show luaunit >/dev/null 2>&1  || maybe_sudo luarocks install luaunit

###############################################################################
log "5/7 Installing StyLua formatter"
###############################################################################
if ! command -v stylua >/dev/null 2>&1; then
    TMPZIP="$(mktemp /tmp/stylua.XXXX.zip)"
    curl -sL -o "$TMPZIP" "https://github.com/JohnnyMorganz/StyLua/releases/download/v${STYLUA_VERSION}/stylua-linux-x86_64.zip"
    INSTALL_DIR="$(mktemp -d /tmp/stylua_install.XXXX)"
    unzip -o "$TMPZIP" stylua -d "$INSTALL_DIR" >/dev/null
    maybe_sudo mv "$INSTALL_DIR/stylua" /usr/local/bin/
    rm -rf "$TMPZIP" "$INSTALL_DIR"
fi

###############################################################################
log "6/7 Installing lua-language-server"
###############################################################################
if ! command -v lua-language-server >/dev/null 2>&1; then
    LLS_URL=$(curl -s https://api.github.com/repos/LuaLS/lua-language-server/releases/latest \
        | grep browser_download_url | grep linux-x64 | grep -v musl | cut -d'"' -f4 | head -1)
    [[ -n "$LLS_URL" ]] || { echo "ERROR: could not resolve lua-language-server download URL"; exit 1; }
    TARGZ="$(mktemp /tmp/lls.XXXX.tar.gz)"
    curl -sL -o "$TARGZ" "$LLS_URL"
    maybe_sudo mkdir -p /opt/lua-language-server
    maybe_sudo tar -xzf "$TARGZ" -C /opt/lua-language-server
    maybe_sudo ln -sf /opt/lua-language-server/bin/lua-language-server /usr/local/bin/lua-language-server
    rm -f "$TARGZ"
fi

###############################################################################
log "7/7 Verification"
###############################################################################
if [[ " $* " == *" --no-verify "* ]]; then
    echo "Skipping verification."
    exit 0
fi

cd "$DEFOLD_DIR/testproject"
FAIL=0

# run_check <label> <command...> — records failure without aborting (set -e safe)
run_check() {
    local label="$1"; shift
    echo "--- $label ---"
    if ! "$@"; then
        FAIL=1
    fi
}

run_check "bob.jar" java --enable-native-access=ALL-UNNAMED -jar ../bob.jar --version
run_check "luacheck version" luacheck --version
run_check "stylua" stylua --version
run_check "lua-language-server" lua-language-server --version
run_check "busted tests" busted --lpath="./main/?.lua" spec
run_check "lint" luacheck main spec

echo ""
if [[ $FAIL -eq 0 ]]; then
    echo -e "\033[1;32mEnvironment fully restored and verified.\033[0m"
    echo "Next steps:"
    echo "  cd $DEFOLD_DIR/testproject"
    echo "  make bundle        # build HTML5 bundle into build_html5/"
    echo "  make serve         # serve at http://localhost:8000"
else
    echo -e "\033[1;31mSome checks failed — review output above.\033[0m" >&2
    exit 1
fi

Monitor displaying Python code and an AI coding assistant beside a keyboard and mouse

Free AI Coding in GitHub Codespaces with Ox Alpha

If you want a cloud-based coding environment where you can open a GitHub repository, ask an AI to inspect and edit the code, and avoid paying for a separate coding-agent subscription, there is a surprisingly simple setup:

GitHub Codespaces + VS Code + OpenRouter + Ox Alpha

At the time of writing, Ox Alpha (stealth/ox-alpha) is available through OpenRouter for free, with a 1-million-token context window. OpenRouter describes it as a reasoning model designed specifically for coding and sustained agentic work.

The key is that you don’t actually need OpenCode or another separate coding application. VS Code can connect to OpenRouter and use the model from its built-in AI tooling.

What you’ll need

  • A GitHub account
  • A GitHub repository containing your project
  • GitHub Codespaces
  • VS Code’s AI/agent features
  • An OpenRouter account
  • An OpenRouter API key

GitHub Codespaces provides a cloud-hosted development environment that can be opened directly in the browser or through VS Code.


1. Create an OpenRouter API key

Go to:

OpenRouter API Keys

Create a new API key and copy it somewhere safe.

At present, OpenRouter lists Ox Alpha as:

  • Model: stealth/ox-alpha
  • Price: Free
  • Context: 1,048,576 tokens
  • Provider: Stealth

Important: “Free” is the current pricing for the model and can change. Check the OpenRouter model page before relying on it for a longer-term project.


2. Add the key to GitHub Codespaces

Don’t put your API key directly into your repository.

GitHub provides Codespaces secrets specifically for credentials such as API tokens.

Go to your GitHub account’s Codespaces settings:

GitHub Codespaces settings

Create a new secret:

Name:

OPENROUTER_API_KEY

Value:

Your OpenRouter API key.

Give the secret access to your repository

This part is easy to miss.

When creating the secret, make sure the repository containing your Codespace is included in the secret’s repository access.

Codespaces secrets can be assigned to repositories you have access to.


3. Open your Codespace

Open your repository and launch a Codespace.

Once VS Code has loaded, open Chat.

You don’t need to install OpenCode, Codex CLI, or an OpenRouter package.


4. Add OpenRouter to VS Code

In the VS Code Chat interface, click the current model selector.

For example, you may initially see:

Auto

Choose:

Manage Models

Then:

Add Models

Select:

OpenRouter

VS Code will ask for your OpenRouter API key.

Enter the key you created earlier.

VS Code will then retrieve the models available through OpenRouter.


5. Find Ox Alpha

In the model list, search for:

Ox Alpha

You should find:

stealth/ox-alpha

Select/add it.

You can subsequently return to Manage Models to see OpenRouter and the models you’ve added.


6. Use Ox Alpha as your coding agent

Now comes the useful part.

Select Ox Alpha as your model and use VS Code’s Agent mode.

Give it a simple read-only task first:

Inspect this repository and explain what the application does. Identify the main entry point and the most important files. Don’t modify anything yet.

If it successfully examines the project, you know the agent has access to your workspace.

Then you can give it an editing task:

Find the cause of the current bug. Explain what you found, then fix it and run the relevant tests.

The agent can then work with the files in your Codespace rather than simply answering questions about code pasted into a chat window.


7. A useful first prompt

When starting on an unfamiliar repository, I recommend:

First inspect the repository and understand its architecture. Don’t make any changes. Tell me what the application does, what framework it uses, where the main entry point is, and where I should look for the functionality I’m interested in.

Once you’ve established that it understands the project, you can give it permission to make changes.

For example:

Implement the change we discussed. You may edit the necessary files and run tests. Don’t modify unrelated parts of the project. At the end, summarize every file you changed and the tests you ran.


What this setup gives you

The final setup is:

GitHub Repository       

GitHub Codespace

VS Code

VS Code Agent

OpenRouter

Ox Alpha

You get a cloud development environment + AI coding agent + Ox Alpha without needing a separate OpenCode subscription.


One important privacy consideration

There’s a significant caveat with Ox Alpha.

OpenRouter currently states that Ox Alpha is operated by a third-party provider called Stealth, and that prompts and completions are retained by the provider, although they are not used for training.

So I’d avoid using this setup with:

  • API keys
  • passwords
  • private customer information
  • proprietary secrets
  • sensitive production data

And make sure secrets aren’t sitting in your repository for the agent to accidentally read.


The result

The attractive part of this setup is that there are three separate pieces, each doing one job:

GitHub Codespaces gives you the actual cloud computer and repository.

VS Code Agent provides the interface that can understand and work on your codebase.

OpenRouter + Ox Alpha provides the AI model. OpenRouter currently lists Ox Alpha as free and specifically describes it as being designed for coding and sustained agentic work.

So you can essentially turn a GitHub repository into a free, browser-based AI coding workspace with Ox Alpha doing the coding.

Person facing a security gate undergoing facial recognition scan on a digital device

When “Consent” Isn’t a Choice: Why Being Forced to Hand Over Your Face Should Worry All of Us

Imagine buying tickets online, from one of the biggest ticketing platforms, for years without a problem. Then one day your account is quietly frozen. You can still see your past orders, but you can no longer buy anything. There was no warning, no explanation of what you did wrong, and no human you can talk to. To get your account working again, the company tells you there is exactly one path forward: submit a scan of your face to a third-party verification company.

That’s it. No document check. No phone call. No manual review. A facial scan, or nothing.

This is happening now, to ordinary customers, at major platforms. And while it might look like a minor inconvenience, it touches some of the most important protections we have under data protection law. Here’s why it matters — not just for one person, but for everyone.

The problem with calling it “consent”

Your face is not like an email address or a postcode. Under the GDPR, a facial scan used to identify you is special-category biometric data — the most sensitive tier of personal information, alongside health records and religious beliefs. The law sets a deliberately high bar for processing it. In most consumer situations, the only realistic legal basis is your explicit consent.

But consent has a precise legal meaning. It must be:

  • Freely given — a genuine choice, with no penalty for saying no.
  • Specific and informed — you know exactly what you’re agreeing to and who gets your data.
  • Explicit — a clear, affirmative act, not something inferred from your behaviour.

Now hold that definition against how these schemes actually work. You’re told your account will stay restricted unless you provide the scan. When you ask whether there’s any other way to prove who you are, you’re told — in writing — that there is no alternative, and that the facial scan is a condition of using the service again.

Pause on that. If something is a condition with no alternative, it is not a choice. And if it is not a choice, it cannot be “freely given consent.” You can’t dress up a requirement as a favour by calling it consent on the sign-up screen. Regulators and the courts have been clear about this for years: consent that is bundled into service access, and backed by a penalty for refusing, is not valid consent at all.

There’s an even simpler tell. Some of these systems treat you as having “consented” merely by proceeding with the verification. But consent to biometric processing must be explicit — a deliberate, unambiguous act. “You clicked next, so you agreed” is the opposite of explicit.

The illusion of alternatives

Companies defending these schemes often point to “options.” Look closely and the options tend to evaporate:

  • “Just delete your account and make a new one.” Except account deletion is frequently blocked if you’re holding tickets or orders for a future event — so you can’t leave even if you want to. And a new account runs through the same risk-scoring system, so it can be flagged and sent down the exact same biometric funnel.
  • “Completing the check restores access.” Sometimes the fine print admits it doesn’t guarantee anything.

When every exit is a dead end, the “choice” is theatre. What’s really happening is compulsory biometric collection wearing a consent costume.

Decisions made by a machine, with no one accountable

Many of these account restrictions are triggered by an automated risk-scoring model — an algorithm that decides you look suspicious. You’re rarely told what data points it used, how it weighed them, or why you specifically were flagged.

The GDPR anticipated exactly this. It gives people rights around decisions made solely by automated means that significantly affect them, including the right to meaningful human intervention and an explanation. But “human review” only counts if a human can actually reach a different outcome. If the review’s only possible result is “comply with what the algorithm already demanded,” and the company won’t explain how it reached its conclusion, that isn’t meaningful oversight. It’s a rubber stamp with a person’s name on it.

Transparency you were never given

Data protection law requires companies to tell you, up front, what they do with your data and who they share it with. Yet in several of these cases:

  • The privacy notice names some fraud-screening partners but not the biometric verification provider actually collecting your face.
  • The notice may even state the company doesn’t typically make automated decisions — while an automated model is quietly freezing accounts.

You cannot meaningfully consent to something you were never told was happening. Transparency isn’t a nicety; it’s the foundation the rest of the framework stands on.

Collecting more than necessary — and keeping it too long

Two more principles are at stake:

  • Data minimisation — you should only collect what’s genuinely necessary. If a document check or manual review can confirm someone’s identity, insisting on a facial scan and refusing every less-intrusive method suggests the goal is to harvest biometrics, not to verify identity.
  • Storage limitation — sensitive data shouldn’t be kept longer than needed. When biometric data from failed or refused checks is retained for years — often because the company chose a long retention period, not because any law requires it — that’s a serious overreach.

Why this is bigger than tickets

It’s tempting to shrug this off. It’s just an entertainment account, right? But the principle scales terrifyingly well. Once we accept “hand over your biometrics or lose access” as a normal way to use everyday services, the same logic can be applied to banking, travel, utilities, healthcare portals — anything. Your face is not a password you can change if it leaks. Once it’s captured, scored, shared with third parties, and stored, you have permanently lost control of it.

Biometric coercion normalised in low-stakes contexts becomes biometric coercion everywhere.

What people can actually do

If you find yourself in this position:

  1. Ask, in writing, for the specific legal basis for processing your biometric data, and request a non-biometric alternative (document check or manual review).
  2. Request the logic behind any automated decision affecting you, and ask for genuine human review.
  3. Make a Subject Access Request to see what data they hold and how it’s being used.
  4. Keep every reply. A company’s own written words — “there is no alternative,” “this is a condition” — are often the strongest evidence that its “consent” basis doesn’t hold up.
  5. Complain to your data protection authority. In Ireland that’s the Data Protection Commission; across the EU, every country has one. Regulators can investigate lawful basis, transparency, automated decision-making, and retention — and can order companies to change course.

The bottom line

Fraud prevention is a legitimate goal. Nobody disputes that companies need to protect their platforms. But the law is clear that fighting fraud does not give a company a blank cheque to demand the most sensitive data you have, strip away real alternatives, hide who’s involved, and then call the result “consent.”

Consent means the freedom to say no. The moment saying no costs you the service, it stops being consent — and starts being coercion. Recognising that difference, and pushing back when the line is crossed, is how we keep it from becoming the default for everything.

COD Mobile maps — original game, series, size, and modes (historical, sorted by original game)

Below is a comprehensive table of COD Mobile multiplayer maps (historical), grouped by the original console/PC game they came from. Map size is given as Small / Medium / Large. Modes supported lists the multiplayer modes the map has historically appeared in (TDM = Team Deathmatch; Dom = Domination; HP = Hardpoint; S&D = Search & Destroy; GF = Gunfight; FFA = Free‑for‑All; BR = Battle Royale; others noted where relevant).

MapOriginal GameSeriesSizeModes Supported
CrossfireCall of Duty 4: Modern Warfare (2007)MWMediumTDM; Dom; HP; S&D; FFA
CrashCall of Duty 4: Modern Warfare (2007)MWMediumTDM; Dom; HP; S&D; FFA
KillhouseCall of Duty 4: Modern Warfare (2007)MWSmallTDM; GF; S&D; FFA
ShipmentCall of Duty 4: Modern Warfare (2007)MWSmallTDM; GF; S&D; FFA
VacantCall of Duty 4: Modern Warfare (2007)MWMediumTDM; Dom; S&D; FFA
TerminalModern Warfare 2 (2009)MW2MediumTDM; Dom; HP; S&D; FFA
HighriseModern Warfare 2 (2009)MW2MediumTDM; Dom; HP; S&D; FFA
ScrapyardModern Warfare 2 (2009)MW2MediumTDM; Dom; HP; S&D; FFA
RustModern Warfare 2 (2009)MW2SmallTDM; GF; S&D; FFA
DomeModern Warfare 3 (2011)MW3SmallTDM; Dom; S&D; FFA
HardhatModern Warfare 3 (2011)MW3SmallTDM; GF; S&D; FFA
NuketownCall of Duty: Black Ops (2010)Black OpsSmallTDM; Dom; HP; S&D; FFA
Firing RangeCall of Duty: Black Ops (2010)Black OpsMediumTDM; Dom; HP; S&D; FFA
SummitCall of Duty: Black Ops (2010)Black OpsMediumTDM; Dom; HP; S&D; FFA
JungleCall of Duty: Black Ops (2010)Black OpsMediumTDM; Dom; HP; S&D
RaidCall of Duty: Black Ops II (2012)Black Ops IIMediumTDM; Dom; HP; S&D; FFA
StandoffCall of Duty: Black Ops II (2012)Black Ops IIMediumTDM; Dom; HP; S&D; FFA
HijackedCall of Duty: Black Ops II (2012)Black Ops IISmallTDM; GF; S&D; FFA
SlumsCall of Duty: Black Ops II (2012)Black Ops IIMediumTDM; Dom; HP; S&D
ExpressCall of Duty: Black Ops II (2012)Black Ops IIMediumTDM; Dom; HP; S&D
TakeoffCall of Duty: Black Ops II (Uprising DLC)Black Ops IIMediumTDM; Dom; HP; S&D
MeltdownCall of Duty: Black Ops II (2012)Black Ops IIMediumTDM; Dom; HP; S&D
HaciendaCall of Duty: Black Ops 4 (2018)Black Ops 4MediumTDM; Dom; HP; S&D
PineCall of Duty: Modern Warfare (2019)MW (Reboot)SmallTDM; GF; S&D; FFA
KingCall of Duty: Modern Warfare (2019)MW (Reboot)SmallTDM; GF; S&D
Shoot HouseCall of Duty: Modern Warfare (2019)MW (Reboot)SmallTDM; Dom; GF; S&D
Aniyah IncursionCall of Duty: Modern Warfare (2019)MW (Reboot)MediumTDM; Dom; HP; S&D
MonasteryCall of Duty Online (China)COD OnlineMediumTDM; Dom; HP; S&D
BreachCall of Duty Online / VariousCOD OnlineMediumTDM; Dom; HP; S&D
CageOriginal to COD MobileCOD MobileSmallTDM; GF; S&D; FFA
TunisiaOriginal to COD MobileCOD MobileLargeTDM; Dom; HP; S&D; BR (event)
OasisOriginal to COD MobileCOD MobileMediumTDM; Dom; HP; S&D
ReclaimOriginal to COD MobileCOD MobileMediumTDM; Dom; HP; S&D
Apocalypse (Mobile)Original to COD Mobile (mobile variant)COD MobileLargeTDM; Dom; HP; S&D; BR (event)
CoastalOriginal to COD MobileCOD MobileMediumTDM; Dom; HP; S&D
ShootoutModern Warfare (2019) / Mobile variantMW (Reboot)SmallTDM; GF; S&D
Nuketown RussiaBlack Ops 4 (variant)Black Ops 4SmallTDM; Dom; HP; S&D
Crossfire (Remake variants)Various remakes (MW series)MWMediumTDM; Dom; HP; S&D
Crash (Remake variants)Various remakes (MW series)MWMediumTDM; Dom; HP; S&D
Terminal (Remake variants)MW2 remakes / portsMW2MediumTDM; Dom; HP; S&D
Shipment 1944 / variantsVarious COD titles (remakes)MW / MW2SmallTDM; GF; S&D
Rust (variants)MW2 remakes / portsMW2SmallTDM; GF; S&D
Scrapyard (variants)MW2 remakes / portsMW2MediumTDM; Dom; HP; S&D
Dome (variants)MW3 remakes / portsMW3SmallTDM; Dom; S&D
Hardhat (variants)MW3 remakes / portsMW3SmallTDM; GF; S&D
Vacant (variants)MW remakes / portsMWMediumTDM; Dom; S&D
Express (variants)BO2 remakes / portsBlack Ops IIMediumTDM; Dom; HP; S&D
Hijacked (variants)BO2 remakes / portsBlack Ops IISmallTDM; GF; S&D
Raid (variants)BO2 remakes / portsBlack Ops IIMediumTDM; Dom; HP; S&D
Standoff (variants)BO2 remakes / portsBlack Ops IIMediumTDM; Dom; HP; S&D
Gang War / event mapsMobile originals / seasonalCOD MobileVariesTDM; Dom; HP; S&D; limited events
Other seasonal / event mapsVarious originals and remakesMixedVariesTDM; Dom; HP; S&D; limited playlists

Notes and clarifications

  • “Modes Supported” lists modes the map has historically appeared in across COD Mobile seasons and events; seasonal playlists and limited-time variants mean a map’s available modes can change over time.
  • Size is a practical classification (Small = tight/close quarters; Medium = standard 3‑lane; Large = open or objective/BR‑sized). Some maps have multiple variants that alter size.
  • Variants and remakes: COD Mobile often uses remade or tweaked versions of console maps; those are listed under the original map with “variants” where appropriate.
  • This table is the full historical view (Option A) you requested; if you want it exported, filtered, or re-sorted (by size, by mode, or by a single original game), tell me which sort or filter and I’ll produce that view next.

How to Fix the GC IPL Error in Dolphin When Using RetroBat

If you’ve ever tried launching a GameCube game through Dolphin and been greeted with the dreaded “GC IPL file could not be found” error, you’re not alone. This issue can be frustrating, especially when everything else seems to be set up correctly. But don’t worry—there’s a simple fix, and we’ll walk you through it.

🧩 What Causes the GC IPL Error?

The error typically stems from a missing or incorrect BIOS file (also known as the IPL file) required for the GameCube boot animation. While the game itself may be perfectly fine, Dolphin attempts to load the BIOS sequence before launching the game—and if it can’t find the right file, it throws an error.

✅ Fixing the Error in Dolphin (Standalone)

If you’re running Dolphin directly (not through RetroBat), you can bypass the BIOS boot sequence entirely by tweaking a simple setting:

  1. Locate your dolphin.ini configuration file.
  2. Open it in a text editor.
  3. Find the line that says SkipIPL.
  4. Set it to True.

ini

[Core]
SkipIPL = True

This tells Dolphin to skip the BIOS animation and jump straight into the game—no IPL file needed.

🔄 Fixing the Error in Dolphin via RetroBat

If you’re using RetroBat as your frontend, the fix is slightly different. RetroBat tends to overwrite Dolphin’s configuration files each time you launch a game, so editing dolphin.ini manually won’t stick.

Instead, you need to configure RetroBat itself to skip the BIOS:

  1. Launch RetroBat and press Start to open the Main Menu.
  2. Navigate to: Game Settings > Per System Advanced Configuration
  3. Select the console you’re working with (e.g., GameCube).
  4. Go to: Emulation > Skip Bios
  5. Set it to Yes.

This ensures that RetroBat tells Dolphin to skip the IPL sequence every time, avoiding the error altogether.

🎮 Final Thoughts

The GC IPL error might seem like a showstopper, but it’s really just a BIOS boot hiccup. Whether you’re using Dolphin standalone or through RetroBat, skipping the IPL sequence is a quick and effective workaround. Now you can get back to what matters—playing your favorite GameCube classics without interruption.

Got other emulation quirks you’re trying to solve? Drop them in the comments or reach out—I’m always up for a good retro tech fix.

Comprehensive Guide to Helping an Ai Coding Agent Identify and Avoid Common Coding Bad Practices

Introduction

In large projects, subtle anti-patterns can slip through reviews—like importing modules mid-file or conditionally. These non-standard import placements obscure dependencies, make static analysis unreliable, and lead to unpredictable runtime errors. This web article dives into that practice, outlines a broader set of coding bad practices, and even provides a ready-to-use AI coding agent prompt to catch every issue across your codebase.

What Is Non-Standard Import Placement?

Imports or require statements buried inside functions, conditional branches, or midway through a file violate expectations of where dependencies live. Best practices and most style guides mandate that:

  • All imports sit at the top of the file, immediately after any module docstring or comments.
  • Conditional or lazy loading only happens with clear justification and documentation.

When imports are scattered:

  1. Static analysis tools can’t reliably determine your project’s dependency graph.
  2. Developers hunting for missing or outdated modules lose time tracing hidden import logic.
  3. You risk circular dependencies, initialization bugs, or runtime surprises.

A Broader List of Coding Bad Practices

Below is a table of widespread anti-patterns—some classic hygiene issues and others that modern AI agents might inject or overlook:

Bad PracticeDescription
Spaghetti CodeCode with no clear structure making maintenance difficult.
Hardcoding ValuesEmbedding constants directly instead of using config or constants.
Magic Numbers/StringsUsing unexplained literals instead of named constants.
Global State AbuseOverusing global variables causing unpredictable side effects.
Poor Naming ConventionsUsing vague or misleading variable and function names.
Lack of ModularityWriting large monolithic blocks instead of reusable functions.
Copy-Paste ProgrammingDuplicating code rather than abstracting shared logic.
No Error HandlingIgnoring exceptions or failing to validate inputs.
OverengineeringAdding unnecessary complexity or abstraction.
Under-documentationFailing to comment or explain non-obvious logic.
Tight CouplingMaking modules overly dependent on each other.
Ignoring Style GuidesNot following language-specific conventions or style guides.
Dead CodeLeaving unused or unreachable code paths in the codebase.
Inconsistent FormattingMixing indentation styles or inconsistent code layout.
Not Using Version Control ProperlyCommitting broken code, poor commit messages, ignoring branching.
Non-standard Import PlacementPlacing imports mid-file or conditionally instead of at the top.
Missing Security ChecksOmitting authentication, authorization, or input sanitization.
Inefficient AlgorithmsUsing suboptimal logic that hurts performance.
Hallucinated DependenciesReferencing non-existent libraries or methods from AI suggestions.
Incomplete Code GenerationLeaving functions or loops unfinished due to AI cutoffs.
Prompt-biased SolutionsGenerating code that only fits the prompt and fails general cases.
Missing Corner CasesOverlooking edge cases and error conditions in logic.
Incorrect Error MessagesProviding vague or misleading error feedback to users.
Logging Sensitive DataWriting confidential information to logs without sanitization.
Violating SOLID PrinciplesBreaking single responsibility or open/closed design rules.
Race ConditionsFailing to handle concurrency leading to unpredictable bugs.

Crafting an AI Coding Agent Prompt

To ensure an AI auditor doesn’t skip files, ignore edge cases, or take shortcuts, use the following prompt. It instructs the agent to comprehensively scan every line, record each finding, and tally occurrences of every bad practice.

## Prompt

You are an expert AI code auditor. Your mission is to exhaustively scan every file and line of the codebase and uncover all instances of known bad practices. Do not skip or shortcut any part of the project, even if the code is large or complex. Report every finding with precise details and clear remediation guidance.

## Scope
- Analyze every source file, configuration, script, and module.
- Treat all code as in-scope; do not assume any file is irrelevant.

## Bad Practices to Detect
- Spaghetti Code
- Hardcoding Values
- Magic Numbers/Strings
- Global State Abuse
- Poor Naming Conventions
- Lack of Modularity
- Copy-Paste Programming
- No Error Handling
- Overengineering
- Under-documentation
- Tight Coupling
- Ignoring Style Guides
- Dead Code
- Inconsistent Formatting
- Improper Version Control Usage
- Non-standard Import Placement
- Missing Security Checks
- Inefficient Algorithms
- Hallucinated Dependencies
- Incomplete Code Generation
- Prompt-biased Solutions
- Missing Corner Cases
- Incorrect Error Messages
- Logging Sensitive Data
- Violating SOLID Principles
- Race Conditions

## Analysis Instructions
1. Traverse the entire directory tree and open every file.
2. Inspect every line—do not skip blank or comment lines.
3. Identify code snippets matching any bad practice.
4. For each instance, document:
   - File path
   - Line number(s)
   - Exact snippet
   - Bad practice name
   - Explanation of why it’s problematic
   - Suggested refactoring

5. Keep a running tally of occurrences per bad practice.

## Output Requirements
- Use Markdown with a section per file.
- Subheadings for each issue.
- End with a summary table listing each bad practice and its total count.
- If the repo is too large, process in ordered batches (e.g., by folder), confirming coverage before proceeding.
- Do not conclude until every file has been reviewed.

Begin the full project audit now, acknowledging you will not take shortcuts.

Next Steps

  • Integrate this prompt into your AI workflow or CI pipeline.
  • Pair it with linters and static analyzers (ESLint, Flake8, Prettier) for automated, real-time checks.
  • Enforce code review policies that catch both human and AI-introduced anti-patterns.

By combining clear style guidelines, automated linting, and an uncompromising AI audit prompt, you’ll dramatically improve code quality, maintainability, and security—project-wide.

How to fix a noisy GPU fan

If you have an old GPU and you have noticed it is creating more noise now than when it was first installed, it may be because the bearing is no longer sufficiently lubricated.

A new fan off EBay, or new to you, might not be a sound investment. This is true assuming you can even find a replacement. Luckily most GPU fans can be serviced.

To Lubricate the Fan Bearing:

Remove the GPU from your computer.

Spin the fan manually. If it is not mostly silent, then there is a problem with the bearing. More than likely, there is just insufficient lubricant.

Carefully peel back the sticker on the top of the fan to expose the bearing. If access to the bearing is not provided on the top of the fan, then remove the fan from the GPU housing. Peel back the sticker on the back of the fan. If you see a yellowish mark on the inside of the sticker where the bearing is, this confirms the lubricant has leaked somewhat. If access to the bearing is not provided at the bottom of the fan either then very carefully try to remove the blade.

Once the bearing is exposed apply a small drop of light machine oil or sewing machine oil to the bearing. Singer oil is a good choice.

Rotate the fan manually to work the oil into the bearing.

Replace the sticker or use a small piece of tape to cover the bearing.

Before reinstalling the GPU, you might consider also applying fresh thermal paste to the GPU processor. This will help keep temperatures down, giving the fan less work to do.

How to add Android as a separate platform in Daijisho

Copy the text below and save it as Android.json

{
    "databaseVersion": 8,
    "platform": {
        "name": "Android",
        "uniqueId": "android",
        "shortname": "android",
        "description": null,
        "acceptedFilenameRegex": "^.*$",
        "scraperSourceList": [
            "RAW:Android"
        ],
        "boxArtAspectRatioId": 0,
        "useCustomBoxArtAspectRatio": false,
        "customBoxArtAspectRatio": null,
        "screenAspectRatioId": 0,
        "useCustomScreenAspectRatio": false,
        "customScreenAspectRatio": null,
        "retroAchievementsAlias": null,
        "extra": ""
    },
    "playerList": [
        {
            "name": "android - activity component player",
            "description": "Android activity component player",
            "acceptedFilenameRegex": "^$",
            "amStartArguments": "-n {android.activity}\n",
            "killPackageProcesses": false,
            "killPackageProcessesWarning": true,
            "extra": ""
        }
    ]
}

Open Daijishou > Settings > (Under All settings) Library > Import Platform > Select the Android.json file.

Now go to the Android Platform > Path > Sync

Note: It is not an official platform and you can flag whether an app is a game or not if you go to daijisho apps section and then long press on an app and mark it as a game/not a game. It will show up in this android platform after syncing. By default the emulators themselves will likely be wrongly flagged as games.

Android TV Sticks, the time is now!

So what am I talking about?

Potentially the future of how we surf the web while sat on the couch.

Android TV Sticks (aka Android Mini PCs, aka Android TV Dongles) are about the size and shape of an overfed USB flash drive but they don’t just store files.

Android TV Stick example

They’re actually tiny computers in themselves that run an Android operating system, generally version 4.2, and accept input from USB, SD cards and Bluetooth devices like mice, keyboards and gamepads. Plug the stick into your TV via the HDMI port and you can run Android apps on the big screen.

To clarify they’re essentially powerful phones/tablets without the display (which is the expensive bit) making them really cheap, around $70. The thumb sized MK802, was first brought to market in May 2012 but I held back as the hardware was pretty underwhelming for the work the device would have to do.

But that’s changed with the very recently released quad-core processor models (think 4 brains instead of 1) capable of outputting Full HD display smoothly and powering through graphically intensive games.

(To give you an idea of performance I recently downloaded and installed a 1 GB game while watching an episode of Breaking Bad stored on a flash drive with no issues.)

So why is that cool?

Well think about the apps out there on Google play, you have Facebook & Twitter, Netflix, VLC & MX Player, Spotify, Apollo & Double Twist, Youtube, Chrome & Firefox, Quickoffice NOT TO MENTION ALL THE GAMES THAT ARE FREE TO PLAY!!!

This magical little box turns your TV into a web browser, media player and games console (and if you like looking at spread sheets and word docs on a screen while sat across the room, you can use it for the traditional boring PC stuff too).

You’re effectively making your TV smart (really smart) without spending the extra few thousand clams. And think about this, your big flat screen full HD TV is a capital purchase, that bad boy is going to be bolted to your living room wall for a few years at least. But computers stop being at the forefront of technology within a couple of weeks. Spend a small fortune on a Smart TV and by the end of the year it’ll probably start to seem pretty stupid.

But, so far, Android TV Sticks have proven to be so cheap you can get the next model in six months time which will probably have doubled in brain power. I’m already looking forward to getting my hands on one of the next octa-core models.

So why haven’t you heard of these awesome little contraptions before?

Currently there is lack of big player interest from the likes of Google, Samsung, LG etc. (If anything these relatively new and mysterious devices work against the product portfolios of the big boys).

Production is cornered mainly by little known or unnamed Chinese manufacturers, shrouded in oriental mystery . . . for legal reasons . . . using the Chinese rockchip processor. Some of the devices don’t even ship with any branding. Possibly a legal thing (the eyes of g-oo-gle are ever watchful) or perhaps the manufactures just want to pass the savings of sparse branding onto the customer. Some company names you may have heard batted about though (if you hang out with tech nerds) are Rikomagic and Tronsmart which would be considered reputable (by said nerds).

Another possible reason you might not have heard of these “things” is nobody seems to know what to call them! So here’s my attempt at making a name stick (WORD PLAY!), Android TV Sticks, shall be henceforth known as A.T.S’s.

A.T.S. sounds kinda like TV jargon don’t ya think? Like VHS, DVD or AV cable.

Let’s take it for a spin:

  • I got a new 4.4 ATS.
  • The video playback on this new ATS model is awesome.
  • I’ve put my old ATS in the microwave to see if it explodes.

Yep ATS sounds right.

So you may have heard of the Google Chromecast, so what’s the difference?

Although visually similar, Chromecast and Android sticks have little in common. The Chromecast is simply a receiver. It enables you to transmit/mirror your Chrome tab from your computer or broadcast certain apps from your Android or iOS device to your TV.

That’s all.

The Chromecasts currently retail at around $35 and the ATS’s start at around $70 but if you’re thinking the ATS’s are expensive by comparison you’re forgetting you’re getting an entirely separate computer you can use independently.  It would be like comparing the price of a set of tyres to the price of car. In the same way tyres don’t get you from A to B without the rest of the vehicle the chromecast displays nothing unless you have a device to transmit to it.

Conclusion

I think ATS’s make a pretty compelling argument for themselves. If you have a few clams to spare and you know how to set up an android phone you should give one a try.