Category Archives: Retro

Arcade game screen showing SCORE: 125,480, LEVEL: 3, LIFE, BOMBS, and SHIELD: 88%.

Creating Doppler Sound Effects in Vertical Scrolling Games

Lessons from building the obstacle pass-by effect in a vertical scrolling game (Defold), and how to apply the same technique in any engine.


The problem

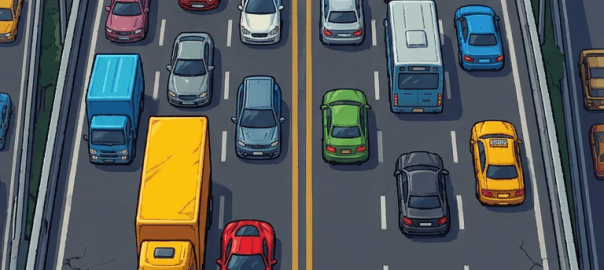
Your player races forward. Cars, trucks, hazards scroll toward them from the top of the screen, scream past on either side, and vanish off the bottom. Right now they’re silent — or worse, every one of them plays the same loop at full volume, producing a wall of noise.

You want the feeling of speed: an approaching engine that rises in pitch, flips into a whoosh at the moment of the pass, and drops away behind you. A real Doppler shift.

The good news: you don’t need physics simulation, DSP, or a middleware audio programmer. You need about four small functions and one design decision.

The key insight: pitch follows velocity, volume follows distance

A common mistake is to derive everything from distance. Don’t. If pitch tracks distance, cars sound like they’re shifting gears as they approach instead of holding a steady tone.

The trick used by Mario Kart (and documented by Audiokinetic’s Wwise team) is:

  • Pitch = relative velocity. While the object closes on the listener, hold the pitch high. After it passes, hold it low. Slide between the two only in a narrow band around the pass point.
  • Volume = live distance. Full volume inside a small radius, smooth falloff out to a “hear bubble” edge.
  • Pan = lateral offset. Left/right from horizontal separation.

Because your objects scroll at a known speed, “relative velocity” collapses to a single number: the sign and magnitude of object_y - listener_y. That’s the whole effect.

-- Pitch: held high while closing, smooth flip at the pass, held low after.
function pitch_ratio(dy, cfg)
    local hi = cfg.pitch_approach   -- e.g. 1.03
    local lo = cfg.pitch_recede     -- e.g. 0.95
    local cross = cfg.cross_span    -- whoosh width in px, e.g. 72
    if dy >= cross then return hi end
    if dy <= -cross then return lo end
    local t = (cross - dy) / (2 * cross)
    t = t * t * (3 - 2 * t)         -- smoothstep: no gear-step click
    return hi + (lo - hi) * t
end

Note how narrow the ratio range is: 1.03 → 0.95. Wide ranges make engine loops sound like gear changes. Subtle is convincing.

Volume: arcade proximity, not inverse-square

Real-world falloff sounds wrong in games. Use the classic arcade curve:

  1. Min-distance sphere — full volume inside a radius (e.g. 55 px).
  2. Quadratic rolloff beyond it: (1 - t)² where t is normalized distance to the bubble edge.
  3. Extra lateral weighting so a car one lane over stays quiet even when level with you:
local lat = 1 / (1 + (dx / lane_width)^2)
gain = radial * (0.28 + 0.72 * lat)

That last term is what makes two lanes away “a whisper” instead of “half volume” — critical when lanes are only ~170 px apart.

Pan and the camera-shake trap

Pan is trivially clamp(dx / pan_width, -1, 1).

But here’s a bug that cost us a debugging round: if you sample positions in world space, any screen shake modulates gain and pan every frame — the audio wobbles whenever the camera jolts. Sample the object’s position relative to its layout parent (local space) for the lateral axis, and world/screen space only for the vertical axis that actually scrolls.

Voice management: nearest-N wins

You can’t play a loop per spawned object. Keep a mixer tick (once per frame) that:

  1. Collects live objects inside the hear bubble.
  2. Sorts them: still-on-screen first, then nearest.
  3. Keeps only MAX_VOICES (3 works well).
  4. Mutes anything that dropped out; starts anything new.

Two lifecycle details that matter:

  • Let finished voices linger. An object culled off-screen should keep playing until its fade completes, otherwise the sound chops mid-note. Extend the recede window by a fraction (KEEP_FRAC ≈ 1.15) of travel time past the cull line.
  • Never set gain to exactly zero mid-play. Most engines (Defold included) drop zero-gain voices entirely, and later gain changes are then silent. Clamp to a tiny floor (~0.002) and use explicit stop for real mutes.

One voice per instance, not shared slots

Tempting shortcut: a pool of N loop players, reassigned each frame. Don’t. When the pool reassigns, one car steals another’s voice mid-pass and the mix stutters. Give each spawner its own component/channel and address it directly — memory is cheap, glitches are not.

Make late levels stay bright

If your game speeds up over time, a fixed pitch curve makes fast passes feel identical to slow ones. Scale the held pitch ends with scroll pace:

local pace = clamp(scroll_px_per_sec / reference_speed, 1, max_pace)
hi = hi + (pace - 1) * lift_per_pace   -- +0.08 per extra 1x start speed
lo = lo - (pace - 1) * drop_per_pace   -- +0.025 → stronger whoosh contrast

Cap both ends (e.g. 1.28 / 0.88). Now deep runs genuinely sound faster.

Architecture checklist

Whatever your engine, structure it like this — it keeps the math testable and the system reskinnable:

LayerResponsibilityTestable?
Pure math modulepitch/gain/pan/phase curves, voice selectionYes — plain unit tests
Mixer/tickper-frame orchestration, lifecycle, loggingMostly
Transportactual play/stop/pause calls, engine quirksNo
Snapshotmaps game state to {id, x, y, lane} recordsYes

Keep all tunables in one config table with guards in tests (e.g. “recede window < hear window”, “whoosh width ≤ 100 px”). Future-you will tune this constantly; a config table plus validation beats hunting magic numbers.

Tuning cheat sheet

Start here, adjust by ear:

hear_bubble      = 520 px     approach window
min_dist         = 55 px      full-volume sphere
max_dist         = 520 px     silent at edge
pitch_approach   = 1.03       held while closing
pitch_recede     = 0.95       held after passing
whoosh_width     = 72 px      (or 0.12 s of travel, whichever is larger)
pan_width        = 2 x lane spacing
max_voices       = 3
lane_detune      = +/-0.4 %   separates side-by-side sources

Summary

The “Doppler” effect is three decoupled curves — pitch from velocity sign, volume from 2D distance, pan from lateral offset — driven once per frame by a nearest-N voice mixer. No physics, no DSP. The hard parts aren’t the math; they’re the engineering around it: local-vs-world coordinates, zero-gain voice drops, lingering fades, and per-instance voices. Get those right and a stock engine loop becomes a convincing rush of traffic.

Technique references: Mario Kart-style relative-velocity pitch (Lilley/Scruffy write-up), Audiokinetic Wwise Doppler blog, arcade min/max distance falloff (GameMaker / shmup tradition).
Building a Scalable 2D Game Scene Architecture: From Back to Front

Creating a clean, scalable scene architecture for a 2D game is more than just organizing visuals—it’s about building a system that supports gameplay, UI, effects, and camera logic in a way that’s intuitive and future-proof. In this post, we’ll walk through a layered architecture that separates concerns, supports depth-based gameplay, and keeps your UI crisp and your effects polished.

Whether you’re building a vertical shooter, a platformer, or a retro arcade game, this structure gives you the flexibility to scale without chaos.

🧱 Scene Graph Overview

At the core is root_scene, which contains all visual and logical layers. These layers are organized from background to foreground, with clear roles and transformation rules.

root_scene
├── game_group                            # Camera-controlled gameplay container
│   ├── hidden_group                     # Off-screen/inactive entities (object pooling)
│   ├── background_group                 # Default background layer + depth container
│   │   ├── background_bottom_group      # Farthest background visuals (sky, base)
│   │   ├── background_mid_group         # Parallax mid-layers, distant FX
│   │   ├── background_top_group         # Closest background visuals
│   ├── objects_group                    # Default gameplay layer + depth container
│   │   ├── objects_depth_bottom_group   # Farthest gameplay entities
│   │   ├── objects_depth_mid_group      # Primary gameplay layer (player, pickups)
│   │   ├── objects_depth_top_group      # Foreground gameplay entities
│   ├── foreground_group                 # Foreground visuals + depth container
│   │   ├── foreground_bottom_group      # Farthest foreground elements
│   │   ├── foreground_mid_group         # Mid-range foreground visuals
│   │   ├── foreground_top_group         # Closest foreground overlays
│   ├── visual_fx_group                  # Explosions, particles, transient visuals
│
├── hud_group                            # Score, gauges, indicators (screen-anchored)
├── menu_group                           # Title screen, credits (non-blocking UI)
├── modal_group                          # Pause, game over, dialogs (blocking overlays)
├── debug_group                          # Dev-only overlays, performance HUD
├── screen_fx_group                      # CRT shader, bloom, vignette (post-processing)
  

🧠 Layer Roles & Camera Behavior

Each layer has a defined purpose and relationship with the camera. Gameplay and visual layers move with the camera, while UI and post-processing layers remain fixed or apply globally. Note that background and foreground groups can also be used in menu layers along with menu group.

LayerPurposeTransforms with Camera
game_groupMaster container for gameplay layers✅ Yes
hidden_groupObject pooling, inactive/off-screen entities✅ Yes
background_groupDefault background layer✅ Yes
background_bottom_groupFarthest background visuals (sky, base)✅ Yes
background_mid_groupParallax mid-layers, distant FX✅ Yes
background_top_groupClosest background visuals✅ Yes
objects_groupDefault gameplay layer✅ Yes
objects_depth_bottom_groupFarthest gameplay entities✅ Yes
objects_depth_mid_groupCore gameplay layer (player, enemies, pickups)✅ Yes
objects_depth_top_groupForeground gameplay entities✅ Yes
foreground_groupDefault foreground layer✅ Yes
foreground_bottom_groupFarthest foreground visuals✅ Yes
foreground_mid_groupMid-range foreground visuals✅ Yes
foreground_top_groupClosest foreground overlays✅ Yes
visual_fx_groupExplosions, particles, screen shake✅ Yes
hud_groupScore, gauges, indicators❌ No
menu_groupTitle screen, credits❌ No
modal_groupPause, game over, dialogs❌ No
debug_groupDev overlays, performance HUD❌ No
screen_fx_groupPost-processing shaders (CRT, bloom, vignette)❌ No (global)

🧰 API Naming Conventions

To keep things clean and predictable, each layer has dedicated adders and getters. This ensures encapsulation and avoids direct manipulation of scene graph internals.

🔧 Adders

python

add_to_hidden_group(obj)
add_to_background_group(obj)
add_to_background_bottom_group(obj)
add_to_background_mid_group(obj)
add_to_background_top_group(obj)

add_to_objects_group(obj)
add_to_objects_depth_bottom_group(obj)
add_to_objects_depth_mid_group(obj)
add_to_objects_depth_top_group(obj)

add_to_foreground_group(obj)
add_to_foreground_bottom_group(obj)
add_to_foreground_mid_group(obj)
add_to_foreground_top_group(obj)

add_to_visual_fx_group(obj)
add_to_hud_group(obj)
add_to_menu_group(obj)
add_to_modal_group(obj)
add_to_debug_group(obj)
add_to_screen_fx_group(obj)
  

🔍 Getters

python

get_hidden_group()
get_background_group()
get_background_bottom_group()
get_background_mid_group()
get_background_top_group()

get_objects_group()
get_objects_depth_bottom_group()
get_objects_depth_mid_group()
get_objects_depth_top_group()

get_foreground_group()
get_foreground_bottom_group()
get_foreground_mid_group()
get_foreground_top_group()

get_visual_fx_group()
get_hud_group()
get_menu_group()
get_modal_group()
get_debug_group()
get_screen_fx_group()
  

📏 Ownership & Layering Rules

To maintain clarity and prevent misuse, each type of entity has a designated home:

  • Gameplay entitiesobjects_group or one of its depth layers
  • Background visualsbackground_group or its depth layers
  • Foreground visualsforeground_group or its depth layers
  • HUD elementshud_group
  • Menusmenu_group
  • Blocking overlaysmodal_group
  • Debug toolsdebug_group only
  • Visual effectsvisual_fx_group
  • Post-processing shadersscreen_fx_group
  • Camera transformations → applied only to game_group and its children

🚫 Layering Constraints

To avoid rendering chaos and maintain performance:

  • ❌ No toFront() calls in gameplay layers
  • ✅ UI systems may adjust local order within their own group
  • ✅ Depth layers maintain internal z-ordering

✅ Benefits of This Architecture

  • Clear separation of concerns: Each layer has a distinct visual and logical role
  • Scalable and maintainable: Easy to audit, extend, and debug
  • Camera-friendly: game_group isolates gameplay transformations from UI
  • Depth flexibility: objects_group, background_group, and foreground_group support layered interactions
  • UI integrity: HUD and modals remain crisp and unaffected by zoom/shake
  • Post-processing polish: screen_fx_group applies final visual effects globally

🧪 Final Thoughts

This architecture isn’t just a technical blueprint—it’s a philosophy of clarity. By separating gameplay, background, foreground, UI, and effects into well-defined layers, you empower your team to build faster, debug smarter, and scale confidently.

If you’re working on a game and want help adapting this structure to your engine or genre, I’d love to collaborate. Let’s build something beautiful.

How to Fix the GC IPL Error in Dolphin When Using RetroBat

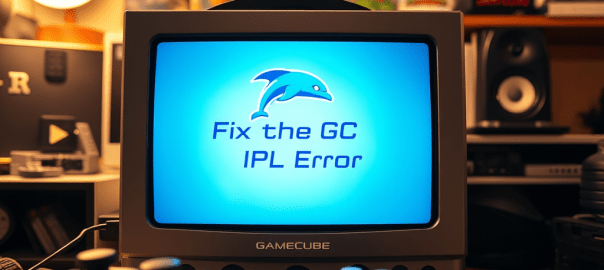
If you’ve ever tried launching a GameCube game through Dolphin and been greeted with the dreaded “GC IPL file could not be found” error, you’re not alone. This issue can be frustrating, especially when everything else seems to be set up correctly. But don’t worry—there’s a simple fix, and we’ll walk you through it.

🧩 What Causes the GC IPL Error?

The error typically stems from a missing or incorrect BIOS file (also known as the IPL file) required for the GameCube boot animation. While the game itself may be perfectly fine, Dolphin attempts to load the BIOS sequence before launching the game—and if it can’t find the right file, it throws an error.

✅ Fixing the Error in Dolphin (Standalone)

If you’re running Dolphin directly (not through RetroBat), you can bypass the BIOS boot sequence entirely by tweaking a simple setting:

  1. Locate your dolphin.ini configuration file.
  2. Open it in a text editor.
  3. Find the line that says SkipIPL.
  4. Set it to True.

ini

[Core]
SkipIPL = True

This tells Dolphin to skip the BIOS animation and jump straight into the game—no IPL file needed.

🔄 Fixing the Error in Dolphin via RetroBat

If you’re using RetroBat as your frontend, the fix is slightly different. RetroBat tends to overwrite Dolphin’s configuration files each time you launch a game, so editing dolphin.ini manually won’t stick.

Instead, you need to configure RetroBat itself to skip the BIOS:

  1. Launch RetroBat and press Start to open the Main Menu.
  2. Navigate to: Game Settings > Per System Advanced Configuration
  3. Select the console you’re working with (e.g., GameCube).
  4. Go to: Emulation > Skip Bios
  5. Set it to Yes.

This ensures that RetroBat tells Dolphin to skip the IPL sequence every time, avoiding the error altogether.

🎮 Final Thoughts

The GC IPL error might seem like a showstopper, but it’s really just a BIOS boot hiccup. Whether you’re using Dolphin standalone or through RetroBat, skipping the IPL sequence is a quick and effective workaround. Now you can get back to what matters—playing your favorite GameCube classics without interruption.

Got other emulation quirks you’re trying to solve? Drop them in the comments or reach out—I’m always up for a good retro tech fix.

Fixing Emulators in RetroBat: Quick Install Guide

Sometimes, quite often actually 🙄, things get corrupted in RetroBat. I’m not knocking it, it’s an absolutelly fantastic emulation frontend and thinkering is just part of the retro games emulation experience. But, yeah, with thinkering. unfortunately things get broke. This includes the emulators themselves.

A quick and dirty way of performing a fresh install of an emulator in RetroBat is to simply delete the specific emulator folder. For example to remove Duckstation, navigate to RetroBat\emulators and then delete Duckstation. To reinstall it then simply open RetroBat enter RETROBAT emulator list and then reinstall.

Side Note:

Instead of Duckstation you can also use Swanstation in Retroarch.

A description of the two is below:

🦆 DuckStation

  • Type: Standalone emulator
  • Focus: High compatibility, speed, and long-term maintainability
  • Platform: Available on Windows, Linux, Android, and macOS
  • Features:
    • Modern UI
    • Save states, widescreen hacks, texture filtering
    • Supports achievements (RetroAchievements)
  • Development: Actively maintained by its original developer
  • Best For: Users who want a full-featured, standalone PS1 emulator with a modern interface

🦢 SwanStation

  • Type: Libretro core (used within RetroArch)
  • Origin: Fork of DuckStation, created due to licensing and distribution disagreements
  • Focus: Same as DuckStation—playability and performance—but within the RetroArch ecosystem
  • Features:
    • Nearly identical emulation to DuckStation
    • Integrated into RetroArch’s unified interface
  • Limitations:
    • May lag behind DuckStation in updates
    • Slightly less customizable outside of RetroArch
  • Best For: Users who prefer RetroArch’s all-in-one emulator interface

How to fix no audio issues with RetroArch on Windows 10 or 11

To troubleshoot a sound issue with RetroArch, follow these steps:

  1. Check that DirectX 9 is installed on the PC. DirectX 9 is not part of Windows 11 by default and if you are running retroarch via an external drive, i.e. usb key, on a new machine it may not have the necessary runtime installed. It can be downloaded here: LINK Note: when the installer is run it will ask what folder to use. This folder is just a temp folder, essentially it is asking where the contents should be extracted. Once the process is finised navigate to the folder you chose and run the DXSETUP.exe file. Once this file has run you can delete the temp folder.
  2. Check if the RetroArch program is muted by pressing random keys on your computer. If it’s muted, go to Settings > Audio and turn off Mute.
  3. If the sound issue persists, try setting the default audio driver to Wasapi and unchecking WASAPI Exclusive Mode and WASAPI Float Format.
  4. If the volume mixer is the culprit, check if it’s listed on the volume mixer and check if RetroArch was set to low volume or muted. If it’s not listed, try downloading a new copy of RetroArch from their website and extracting it into a new directory.
  5. Restart after trying the solutions above.

Organizing ROM Files: How to Safely Move and Sort by Region

Typically there is a pattern to rom file names indicating what region the files belong to. For example it might explicitly state “(USA)” in the file name. However this alone cannot be taken as confirmation that “USA” means the game is from the USA region, USA could simply be part of the game title, e.g. “Daytona USA” etc. Japanese roms often end with the letter “j” but again this could just be part of the name of the game.

So how can one go about cleaning a rom folder without destroying these roms in the process?

You can still use these string elements to move files from one folder to another. The code below will not delete the files it will just move them en masse. If you have found a game was wrongly moved you can always return it.

Note: Always backup files and folders before you manipulate them programmatically.

The code below will need to be updated to reference your specific rom folder and where you want the files to move as well as the character string you are targeting i.e. *j.zip

@echo off

REM Examples file types:
REM Move Japanese files target is *j.zip
REM Move USA files target is *u.zip
REM Move USA files target is *(USA).zip
set target="*j.zip"

set source_folder="C:\roms\"
set destination_folder="C:\roms\_j_roms"

if not exist %destination_folder% (
    md %destination_folder%
)

move %source_folder%%target% %destination_folder%

echo Files with the extension %target% have been moved to %destination_folder%

How to get PICO-8 games to run on Retroid Pocket using Retroarch

One of the best ways to play PICO-8 games on a Retroid Pocket is via the Retroarch core retro8.

However you may run into the problem of only PICO-8 cart images being displayed rather than Retroarch launching the actual game.

You can solve this problem by doing the following:

Retroarch Settings > User Interface > File Browser > Use Built-In Image Viewer and set it on “No”. This way the image viewer will not get in the way, misinterpreting a PICO-8 cart as just a png file.

Happy Gaming!

How to add Android as a separate platform in Daijisho

Copy the text below and save it as Android.json

{
    "databaseVersion": 8,
    "platform": {
        "name": "Android",
        "uniqueId": "android",
        "shortname": "android",
        "description": null,
        "acceptedFilenameRegex": "^.*$",
        "scraperSourceList": [
            "RAW:Android"
        ],
        "boxArtAspectRatioId": 0,
        "useCustomBoxArtAspectRatio": false,
        "customBoxArtAspectRatio": null,
        "screenAspectRatioId": 0,
        "useCustomScreenAspectRatio": false,
        "customScreenAspectRatio": null,
        "retroAchievementsAlias": null,
        "extra": ""
    },
    "playerList": [
        {
            "name": "android - activity component player",
            "description": "Android activity component player",
            "acceptedFilenameRegex": "^$",
            "amStartArguments": "-n {android.activity}\n",
            "killPackageProcesses": false,
            "killPackageProcessesWarning": true,
            "extra": ""
        }
    ]
}

Open Daijishou > Settings > (Under All settings) Library > Import Platform > Select the Android.json file.

Now go to the Android Platform > Path > Sync

Note: It is not an official platform and you can flag whether an app is a game or not if you go to daijisho apps section and then long press on an app and mark it as a game/not a game. It will show up in this android platform after syncing. By default the emulators themselves will likely be wrongly flagged as games.