Below is a quick code snippet example you can reuse to replace multiple words within a string using python.
s = "The quick brown fox jumps over the lazy dog"
print(s)
for r in (("brown", "red"), ("lazy", "quick")):
    s = s.replace(*r)
print(s)

Below is a quick code snippet example you can reuse to replace multiple words within a string using python.
s = "The quick brown fox jumps over the lazy dog" print(s) for r in (("brown", "red"), ("lazy", "quick")): s = s.replace(*r) print(s)

If you have populated your RG35XX PS folder with games yet GarlicOS has not presented PlayStation as a console option this is likely due to GarlicOS not having the functionality to read sub folders and that your games each have dedicated folders. For GarlicOS to see your games all your games must be directly in the console folder.
However typically PS games are in .bin format and are saved in folders because even single disk games will have at least two associated files i.e. the .bin files and the .cue file. For multi disk games, where there is a .bin file and a .cue file for each disk, and potentially a .m3u file to handle multi disk operation, the problem is exacerbated.
One solution would be to convert your PS games to the .chd format. Converting the PS “disks”, i.e. pairs of .cue and .bin files to the .chd format will result in a single file per disk which is also compressed taking up much less space.
To convert “disks” to .chd download the zip of the software “CHDMAN” below:
https://archive.org/details/chdman
Unzipping the file will create a folder CHDMAN.
In this folder open the batch file called “Cue or GDI to CHD” with a text editor and replace the line:
for /r %%i in (*.cue, *.gdi) do chdman createcd -i “%%i” -o “%%~ni.chd”
with:
for /r %%i in (*.cue, *.gdi, *.iso) do chdman createcd -i “%%i” -o “%%~ni.chd”
This update allows the batch file to work with ISO files too.
Now to convert “disks” simply drag and drop the .cue and .bin files into the CHDMAN folder and then double click the batch file “Cue or GDI to CHD” to run it.
This will produce a single .chd file you can then save to the PS folder of your GarlicOS games directory.

The best way of comparing two tables to determine if they are the exact same is to calculate the hash sum of each table and then compare the sum of hash. The benefit of the technique below are that no matter how many fields there are and no matter what data types the fields may be, you can use following query to do the comparison:
SELECT SUM(HASH(*)) FROM t1;
SELECT SUM(HASH(*)) FROM t2;
Of course if the schemas of the two tables are different this will by default produce different hash values.

INSERT INTO tables with VALUES option as achieved with other SQL variants is not supported in Spark SQL as of now. For single record inserts the below example provides two options:
--CREATE test table
CREATE TABLE TestSchema.InsertTest USING DELTA AS (SELECT 1 AS row_id, 'value1' AS field_1, 'value2' AS field_2)

--INSERT INTO test table
INSERT INTO TestSchema.InsertTest SELECT t.* FROM (SELECT 2, 'value3', 'value4') t;

--INSERT INTO test table while aliasing field names
INSERT INTO TestSchema.InsertTest SELECT t.* FROM (SELECT 3 AS row_id, 'value5' AS field_1, 'value6' AS field_2) t;

--Confirm insert
SELECT * FROM TestSchema.InsertTest

When working with data validation—especially in web forms, APIs, or data pipelines—it’s common to check whether a field is empty or null. But sometimes, a field might appear empty at first glance, yet still contain whitespace, hidden characters, or default values that make it technically non-null.
Let’s explore how to determine whether a field is actually empty or null, and how to handle it properly in Python.
A field is considered not empty or null if:
None"")" ")[], {}, or ())These subtle distinctions are important when validating user input or cleaning data.
Here are some Python functions that help determine whether a field is truly non-empty:
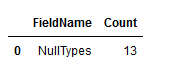
def getListOfMissingValues():
    """
    desc: List of common words used to represent null that are often found in files as text
    """
    lst = ['NaN', 'NAN', 'nan', 'null', 'NULL', 'nul', 'NUL', 'none', 'NONE', '', ' ', '	']
    return lst

def advanceMissingValues(df):
    """
    desc: Count nulls and hardcoded text that represents nulls
    param p1: DataFrame name
    return: DataFrame of field names and count values
    """
    lstMissingVals = getListOfMissingValues()
    col_list = getListOfFieldNames(df)
    output = pd.DataFrame(col_list)
    output.rename(columns = {0:'FieldName'}, inplace = True)
    output['Count'] = ''

    #For each field name count nulls and other null type values
    for col in col_list:
        nullCnt = df[col].isnull().sum(axis=0)
        #For each missing value perform count on column
        missValCnt = 0
        for missVal in lstMissingVals:
            missValCnt = missValCnt + len(df[(df[col]==missVal)])

        cntTotal = nullCnt + missValCnt
        output.loc[output['FieldName'] == col, 'Count'] = cntTotal

    return output

#Test Setup
lst = ['NaN', 'NAN', 'nan', 'null', 'NULL', 'nul', 'NUL', 'none', 'NONE', '', ' ', '	' ,None]
mdf = pd.DataFrame(lst)
mdf.rename(columns = {0:'NullTypes'}, inplace = True)
print(mdf)

#Run Test
chk = advanceMissingValues(mdf)
chk
Sample output:

# Python code demonstrate
# Make headers snake case

import pandas as pd

# initialise data of lists.
data = {'First Name':['Tom', 'nick', 'krish', 'jack'], 'Age of Person':[20, 21, 19, 18]}

# Create DataFrame
df = pd.DataFrame(data)

# Print the output.
print(df)

# Make headers snake case
df.columns = [x.lower() for x in df.columns]
df.columns = df.columns.str.replace("[ ]", "_", regex=True)

# Print the output.
print(df)

When working with Delta Lake tables in Databricks, it’s not enough to simply drop the table from the metastore—you also need to ensure that the underlying data files are removed to prevent clutter and maintain a clean data lake. This process is especially important when dealing with external Delta tables, where Spark does not automatically manage file deletion.
The following steps outline a reliable method to fully remove a Delta table and its associated files using Spark SQL and command-line tools.
Begin by locating the schema and table you want to delete. Replace placeholder values like schemaName and tableName with the actual names used in your environment. This ensures you’re targeting the correct table throughout the process.
Using Spark SQL within Databricks, run a query to describe the table. This will return detailed metadata, including the location of the table’s data files in DBFS (Databricks File System). If you’re using the default schema, it may be named default, but adjust as needed.
In the metadata output, scroll down to find the Location field. This value points to the directory where the table’s data files are stored. Copy this path—it will be used later to manually delete the files if necessary.
Execute a Spark SQL command to drop the table. This removes the table’s metadata from the catalog. If the table is managed, this step may also delete the associated files. However, for external tables, the files will remain and must be deleted manually.
Using your preferred method of interacting with DBFS—whether through the command line, a Python script, or a Databricks notebook—delete the directory identified earlier. This ensures that all data files associated with the table are removed from storage.
Delta tables support ACID transactions and maintain a transaction log. Improper deletion—such as manually removing files without dropping the table—can corrupt the log and lead to inconsistent behavior. By following this structured approach, you ensure both the metadata and physical files are properly cleaned up.
This method is especially useful when:
Let me know if you’d like help turning this into a reusable script or integrating it with your workflow.
#Step 1
#Find and replace schemaName
#Find and replace tableName

#Step 2
#Find the table
#Via Databricks run the Spark SQL query below
#default is schema, change as needed
DESC FORMATTED schemaName.tableName;

#Step 3
#From the table returned scroll down to "location" and copy the field value
#Find and replace locationFieldValue

#Step 5
#Via Databricks using Spark SQL drop the table
DROP TABLE tableName

#Step 6
#Find and replace locationFieldValue
#By the means you use to interact with Databricks File System (dbfs), e.g. cmd python virtual environment
#Run command below
dbfs rm -r "locationFieldValue"

A dynamic pivot table means you do not need to define hard coded column names as a dynamic query will fetch the field values from a column and use them as the column names while pivoting the source table.
Sounds complicated?
It is!
Good thing there are some code examples below you can just steal and alter as you need.
The first example will just return as a SELECT, the second example will write the results to a global temp table called ##Result.
A use case for this might be a continuous requirement to pivot a table however the column name requirements keep changing as field values change.
Example 1: Return as SELECT
/*Mock Table*/
IF OBJECT_ID('tempdb.dbo.#Fruits', 'U') IS NOT NULL
	DROP TABLE #Fruits;

CREATE TABLE #Fruits (
	Fruit VARCHAR(255)
	,Quantity INT
	,DateOf DATETIME
	);

INSERT INTO #Fruits (
	Fruit
	,Quantity
	,DateOf
	)
VALUES
('Apple', 10	,GETDATE())
,('Orange', 10	,GETDATE())
,('Banana', 10, GETDATE())
,('Apple', 11, DATEADD(DAY, - 1, GETDATE()))
,('Orange', 11, DATEADD(DAY, - 1, GETDATE()))
,('Banana', 11, DATEADD(DAY, - 1, GETDATE()))
,('Apple', 12, DATEADD(DAY, - 2, GETDATE()))
,('Orange', 12, DATEADD(DAY, - 2, GETDATE()))
,('Banana', 12, DATEADD(DAY, - 2, GETDATE()))
,('Apple', 13, DATEADD(DAY, - 3, GETDATE()))
,('Orange', 13, DATEADD(DAY, - 3, GETDATE()))
,('Banana', 13, DATEADD(DAY, - 3, GETDATE()));

/*Demo Mock table*/
SELECT *
FROM #Fruits;

/*Logic to dynamically pivot table*/
DECLARE @cols AS NVARCHAR(MAX)
	,@query AS NVARCHAR(MAX);

SELECT @cols = STUFF((
			SELECT DISTINCT QUOTENAME(f.[Fruit]) + ', '
			FROM #Fruits AS f
			FOR XML PATH('')
				,TYPE
			).value('.', 'NVARCHAR(MAX)'), 1, 1, '');

/*Add missing square bracket to start of string*/
SET @cols = '[' + @cols;
/*Remove last comma from string*/
SET @cols = SUBSTRING(@cols, 1, (LEN(@cols) - 1));
SET @query = 'SELECT [DateOf], ' + @cols + ' FROM
             (
              SELECT *
			  FROM #Fruits
            ) x
            pivot
            (
                min(Quantity)
                for [Fruit] in (' + @cols + ')
            ) p ORDER BY RIGHT([DateOf], 4) ASC
			,LEFT(RIGHT([DateOf], 7), 2) ASC
			,LEFT([DateOf], 2) ASC';

EXECUTE (@query);

DROP TABLE #Fruits;
Example 2: Write output to a table
IF OBJECT_ID('tempdb.dbo.##Result', 'U') IS NOT NULL
	DROP TABLE ##Result;
/*Mock Table*/
IF OBJECT_ID('tempdb.dbo.#Fruits', 'U') IS NOT NULL
	DROP TABLE #Fruits;

CREATE TABLE #Fruits (
	Fruit VARCHAR(255)
	,Quantity INT
	,DateOf DATETIME
	);

INSERT INTO #Fruits (
	Fruit
	,Quantity
	,DateOf
	)
VALUES
('Apple', 10	,GETDATE())
,('Orange', 10	,GETDATE())
,('Banana', 10, GETDATE())
,('Apple', 11, DATEADD(DAY, - 1, GETDATE()))
,('Orange', 11, DATEADD(DAY, - 1, GETDATE()))
,('Banana', 11, DATEADD(DAY, - 1, GETDATE()))
,('Apple', 12, DATEADD(DAY, - 2, GETDATE()))
,('Orange', 12, DATEADD(DAY, - 2, GETDATE()))
,('Banana', 12, DATEADD(DAY, - 2, GETDATE()))
,('Apple', 13, DATEADD(DAY, - 3, GETDATE()))
,('Orange', 13, DATEADD(DAY, - 3, GETDATE()))
,('Banana', 13, DATEADD(DAY, - 3, GETDATE()));

/*Demo Mock table*/
SELECT *
FROM #Fruits;

/*Logic to dynamically pivot table*/
DECLARE @cols AS NVARCHAR(MAX)
	,@query AS NVARCHAR(MAX);

SELECT @cols = STUFF((
			SELECT DISTINCT QUOTENAME(f.[Fruit]) + ', '
			FROM #Fruits AS f
			FOR XML PATH('')
				,TYPE
			).value('.', 'NVARCHAR(MAX)'), 1, 1, '');

/*Add missing square bracket to start of string*/
SET @cols = '[' + @cols;
/*Remove last comma from string*/
SET @cols = SUBSTRING(@cols, 1, (LEN(@cols) - 1));
SET @query = 'SELECT [DateOf], ' + @cols + ' INTO ##Result FROM
             (
              SELECT *
			  FROM #Fruits
            ) x
            pivot
            (
                min(Quantity)
                for [Fruit] in (' + @cols + ')
            ) p ORDER BY RIGHT([DateOf], 4) ASC
			,LEFT(RIGHT([DateOf], 7), 2) ASC
			,LEFT([DateOf], 2) ASC';

EXECUTE (@query);

SELECT * FROM ##Result;

DROP TABLE ##Result;

DROP TABLE #Fruits;

The following is a code snippet that would create a table in a “sales” schema called customer.
If no reference to a schema is given the table will be created in the default Spark location.
CREATE TABLE sales.customer USING DELTA AS (SELECT 'John' AS fn, 'Smith' AS sn, 55 AS age)

So you have a PowerShell script and you just want to run it without messing around with permissions, policies, signing it or any other crap. (Yes yes I know all those things are vital for system wide security but you’re in a hurry damn it!)
Right click PowerShell and run as administrator.
When the terminal is open run the following line:
Set-ExecutionPolicy RemoteSigned
When prompted type the letter A and press Enter (if applicable).
Run the below including “&” at start of line with reference to your script, i.e.
& “C:\YourTestDirectory\YourTestFile.ps1”
