The following example is for a computer running Windows 10 or Windows Server 2016.
This tutorial has 5 main steps:
- Create the Root and Child certificates
- Export the Root and Child certificates
- Edit the Root certificate
- Enter the Root certificate into the Azure Point-to-Site configuration
- Connect via the Azure VPN client
Following these instructions should allow you to connect to Azure using the Azure VPN client.
Create the Root and Child Certificates
1. Open the following:
> Windows Start
> (type) run (enter)
> (type) certmgr.msc (enter)
> Personal
> Certificates
This is where your certificates will appear once created so keep the certmgr.msc window open.
2. Open a Windows PowerShell console with elevated privileges.
> Windows Start
> (type) Windows Powershell (right click: Run as Administrator)
3. Copy and paste the following example into Powershell to create the self-signed root certificate and child certificate. The example creates a self-signed root certificate named “PS2RootCert” and “PS2ChildCert” that is automatically installed in “Certificates-Current User\Personal\Certificates” (i.e. step 1).
$cert = New-SelfSignedCertificate -Type Custom -KeySpec Signature `
-Subject "CN=PS2RootCert" -KeyExportPolicy Exportable `
-HashAlgorithm sha256 -KeyLength 2048 `
-CertStoreLocation "Cert:\CurrentUser\My" -KeyUsageProperty Sign -KeyUsage CertSign

New-SelfSignedCertificate -Type Custom -DnsName P2SChildCert -KeySpec Signature `
-Subject "CN=PS2ChildCert" -KeyExportPolicy Exportable `
-HashAlgorithm sha256 -KeyLength 2048 `
-CertStoreLocation "Cert:\CurrentUser\My" `
-Signer $cert -TextExtension @("2.5.29.37={text}1.3.6.1.5.5.7.3.2")
Export the Root and Child certificates
1. Once PS2RootCert has been created and is visible in certmgr right-click on it. Click All Tasks, and then click Export. This opens the Certificate Export Wizard.
2. In the Wizard, click Next
> Select No, do not export the private key, and then click Next
> On the Export File Format page, select Base-64 encoded X.509 (.CER)., and then click Next
> For File to Export, Browse to the location to which you want to export the certificate. For File name, name the certificate file “PS2RootCert”. Then, click Next
> Click Finish to export the certificate
You should then see: “The export was successful”
2. Now export the PS2ChildCert which has slightly different steps to follow than above. In certmgr right-click on PS2ChildCert. Click All Tasks, and then click Export. This opens the Certificate Export Wizard.
> In the Certificate Export Wizard, click Next to continue
> Select Yes, export the private key, and then click Next
> On the Export File Format page, leave the defaults selected. Make sure that Include all certificates in the certification path if possible is selected. This setting additionally exports the root certificate information that is required for successful client authentication. Without it, client authentication fails because the client doesn’t have the trusted root certificate. Then, click Next
> On the Security page, you must protect the private key. If you select to use a password, make sure to record or remember the password that you set for this certificate. Then, click Next
> On the File to Export, Browse to the location to which you want to export the certificate. For File name, name the certificate “PS2ChildCert” Then, click Next.
> Click Finish to export the certificate.
You should then see: “The export was successful”
Edit the Root certificate
1. Open the PS2RootCert certificate with a text editor, such as Notepad++.
2. Copy only the following section (excluding the header and footer between the dashes and the dashes themselves, e.g. —)
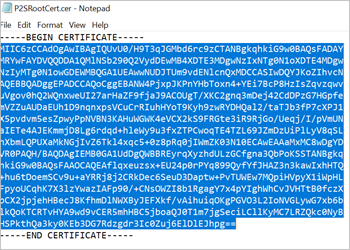
3. Paste the copied text into a new Notepad++ window and edit the pasted text to make sure that the text is one continuous line without carriage returns or line feeds. You may need to modify your view in the text editor to ‘Show Symbol/Show all characters’ to see the carriage returns and line feeds. Once edited copy only the text as one continuous line.
Enter the Root certificate into the Azure Point-to-Site configuration
1. Log into the Azure web portal.
2. Navigate to Virtual Network Gateways > Point-to-site configuration.
3. Paste the certificate data into the Public Certificate Data field.
Name the certificate “PS2RootCert”, or if that name is already in use name the certificate “PS2RootCert_YourUserName”, and then select Save. You can add up to 20 trusted root certificates.

4. Select Save at the top of the page to save all of the configuration settings.
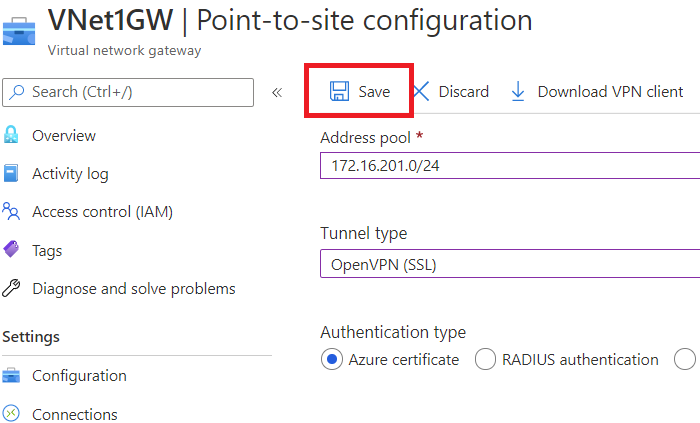
5. Once this is done download the VPN client. This will be the configuration information needed to set up an Azure VPN.

Connect via the Azure VPN client
1. Once the VPN client file has been downloaded unzip it.
You should see 3 folders, one being AzureVPN. Inside AzureVPN is a configuration file called “azurevpnconfig”.
2. Launch the Azure VPN client. At the bottom of the screen to the left there should be a plus icon. Click it and it will give you the options of “Add” or “Import”. Click import.
3. Navigate to the AzureVPN folder and import the file azurevpnconfig. This should populate the VPN Client options with all the relevant information bar authentication type.
4. Under the Client Authentication heading, for Authentication Type choose Certificate and then for Certificate Information choose PS2ChildCert.
(If these options are showing blank then change Certificate Information to “DigiCert Global Root CA”)
Click Save.
You should now have access to Azure via the Azure VPN.
If you found this post helpful please like/share/subscribe.
